Logging Time
A worklog is one time entry. Each worklog belongs to a project and records a date, an interval, a duration, and a description.
Start a timer
Open a work item and select the Time tab. Select Start Timer. Windshift starts a timer and shows a floating timer panel. The panel stays visible while you move through the application.
The timer shows the work item, the project, the customer, and the elapsed time.
Windshift allows one running timer for each user. Stop the running timer before you start another one.
Select Stop Timer to save the worklog. Windshift stores the elapsed duration, the work item, the project, and the current date.
Add a worklog manually
Use a manual entry when you did not start a timer, or when you log time for another day.
- Open the Time page.
- Select Log Time.
- Windshift selects the default time project. Select a different project if needed. Only projects with the status Active accept new worklogs.
- Select a work item. This step is optional.
- Enter a description.
- Select a date.
- Enter a duration. You can also enter a start time and an end time.
- Save the worklog.
Windshift calculates the missing time value. If you enter a start time and a duration, Windshift calculates the end time. If you enter a start time and an end time, Windshift calculates the duration. If you enter only a duration, Windshift records the entry from midnight on the selected date.
Duration formats
Windshift accepts these duration formats:
| Format | Meaning |
|---|---|
1h |
1 hour |
0.5h |
30 minutes |
30m |
30 minutes |
1h30m |
1 hour 30 minutes |
2h15m |
2 hours 15 minutes |
1d |
8 hours |
You do not need to convert durations to minutes. The value 1d equals 8 hours.
Worklog fields
| Field | Required | Description |
|---|---|---|
| Project | No | The project that owns the time. Windshift uses the default time project for the work item or workspace. |
| Customer | No | Windshift copies the customer from the project. |
| Work item | No | The work item the time applies to. |
| Description | Yes | A short summary of the work. |
| Date | Yes | The day the work applies to. |
| Start time | No | The start of the interval. |
| End time | No | The end of the interval. |
| Duration | Yes | The length of the interval. |
Link time to a work item
Link a worklog to a work item when the time applies to a specific task, bug, request, or feature. The work item then shows the logged time in its Time tab. Reports can group the time by work item.
You can book time on a project without a work item. Use this for meetings, administration, and other overhead work.
Edit or delete a worklog
You can edit or delete your own worklogs. A project manager can edit or delete worklogs on the projects they manage. An edit or a deletion updates the totals in reports.
Reports and export
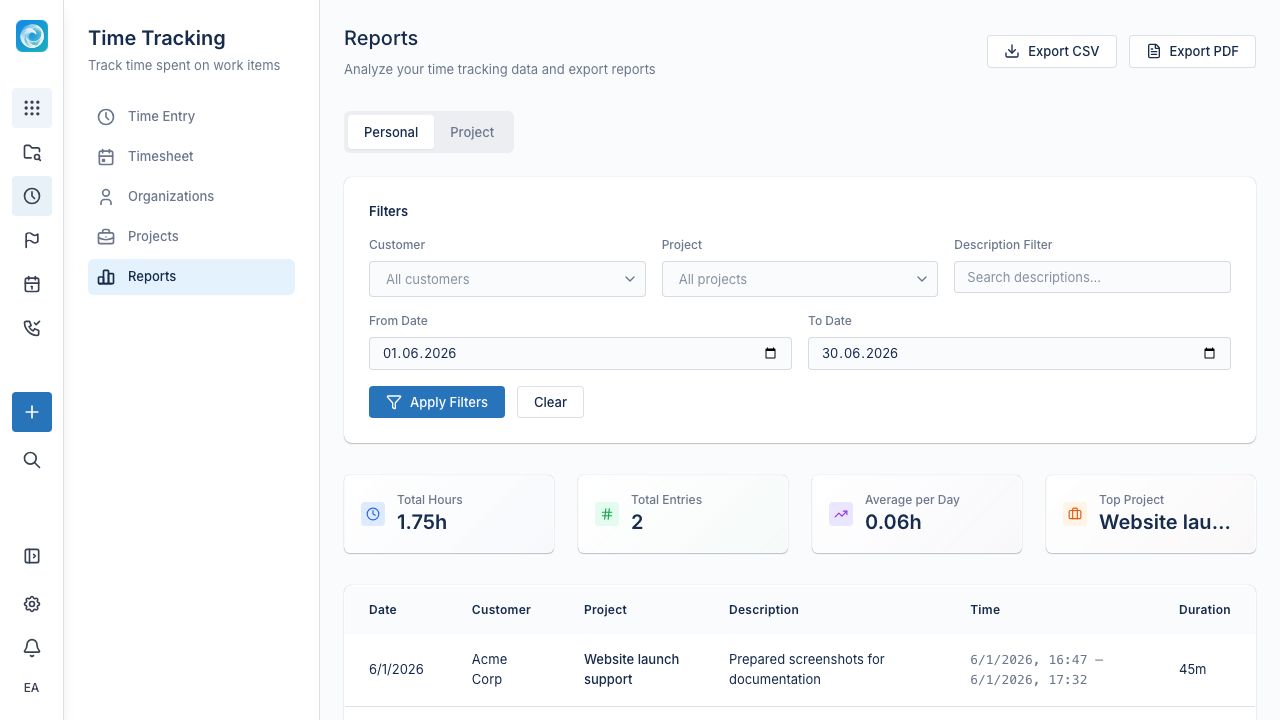
The Time page has two report modes:
- Personal: Shows your worklogs. Every user has this mode.
- Project: Shows all worklogs for the projects you manage. Project managers have this mode.
Filter worklogs by member, customer, project, and date range. Export the result as CSV or PDF. In the calendar week view, export the week as ICS for an external calendar app.
Administrators can enable ICS calendar feed URLs. A feed URL lets an external calendar subscribe to the time entries of a user.
Permissions
Time tracking uses these permissions:
time:readviews projects and worklogs.time:writecreates and updates worklogs.time:deletedeletes worklogs.
Project membership controls who can book time on a project. Project management controls who can edit the project, manage its members, and view all its worklogs. See Projects and Customers.